Homemade Strained Yoghurt
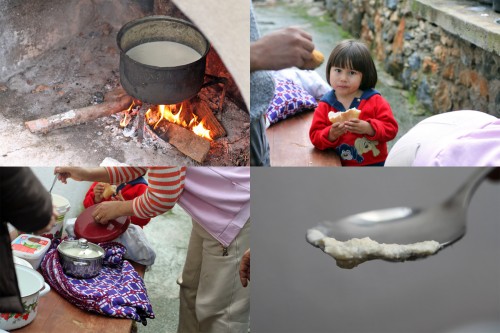
When I was in Bodrum, I got to visit a little agricultural village called Sazkoy, explore the area and have a delicious(!) homemade lunch with a family well-known for the Milas carpets they weave and sell. The village is largely self-reliant, with most families having their own chickens, goats, cows, and sheep. Many grow vegetables and some even have their own citrus trees, ripe with mandarins while I was there.
I got a tutorial in the tradition of yoghurt-making from a woman named Emine. She also uses her fresh cows’ milk to make butter and curd cheese from whey on a regular basis, like most of the families in the area. The yoghurt process was completely intuitive for her, reflexive after obvious years of making it. Where I use a thermometer in my recipe, Emine dips her finger and instinctively knows the right temperature.
The key to yoghurt is that you need some to make some. A little “starter” yoghurt is necessary and adds the appropriate bacteria. I like to use a bit of Turkish or Greek yoghurt to start the process because they contain only live yoghurt cultures and not the preservatives, stabilizers or thickeners that other types do. That said, basic store-bought yoghurt will work perfectly well here too.
The process is incredibly simple – heat milk almost to a boil, cool, add a bit of yoghurt, and keep warm to ferment. To get a thicker consistency, I like to strain my yoghurt like they do in Turkey (as well as Greece, South Asia, the Middle East and even Mexico). This yoghurt keeps for about 7 to 10 days, and you can use some of the homemade yoghurt to start the next batch! It also has an incredibly creamy sweetness to it, slightly less tangy and fresher tasting than the store-bought kind. Cheaper, tastier, and how cool is it to make your own. Enjoy!
Ingredients
1 ½ quarts whole milk
2 tbsps starter plain yoghurt, room temperature
Procedure
In a saucepan, heat milk over medium heat until it starts to bubble and foam, almost at a boil. It should reach 180° F. Remove from heat and cool to 110° F. (The woman I saw making this knows the temperature from dipping her finger in the milk, not from any thermometer. It’s still hot but she could hold her finger in it comfortably.) This temperature is important – significantly hotter and the bacteria will be killed and the yoghurt won’t set. If the temperature is too low, again the bacteria won’t ferment, and the yoghurt won’t set.
In a ceramic bowl or pot that has a lid, add the 2 tablespoons of yoghurt. Add a few spoonfuls of the milk to the yoghurt and whisk to combine. Pour the rest of the milk in using a strainer to catch the skin that forms on top. Whisk to combine thoroughly.
Cover with a lid and swaddle in thick kitchen towels or a blanket. You want to keep this warm for the fermentation process. I keep mine in the oven (off) with just the oven light on.
Yoghurt time can vary. Mine took around 12 hours to set, but it all depends on the temperature, the climate, and the yoghurt starter you used. It could take as little as 6 hours, and some people even claim as long as 24 hours. I like to make it in the evening, so it can set overnight.
Once it’s set, refrigerate immediately. It will firm up a bit more as it cools. I like to then place it in a strainer lined with cheesecloth in the fridge for about 3 hours once it’s cooled to get a thicker consistency but feel free to use as is.
Store in an airtight container; it lasts for about a week.


